
January 202*5*
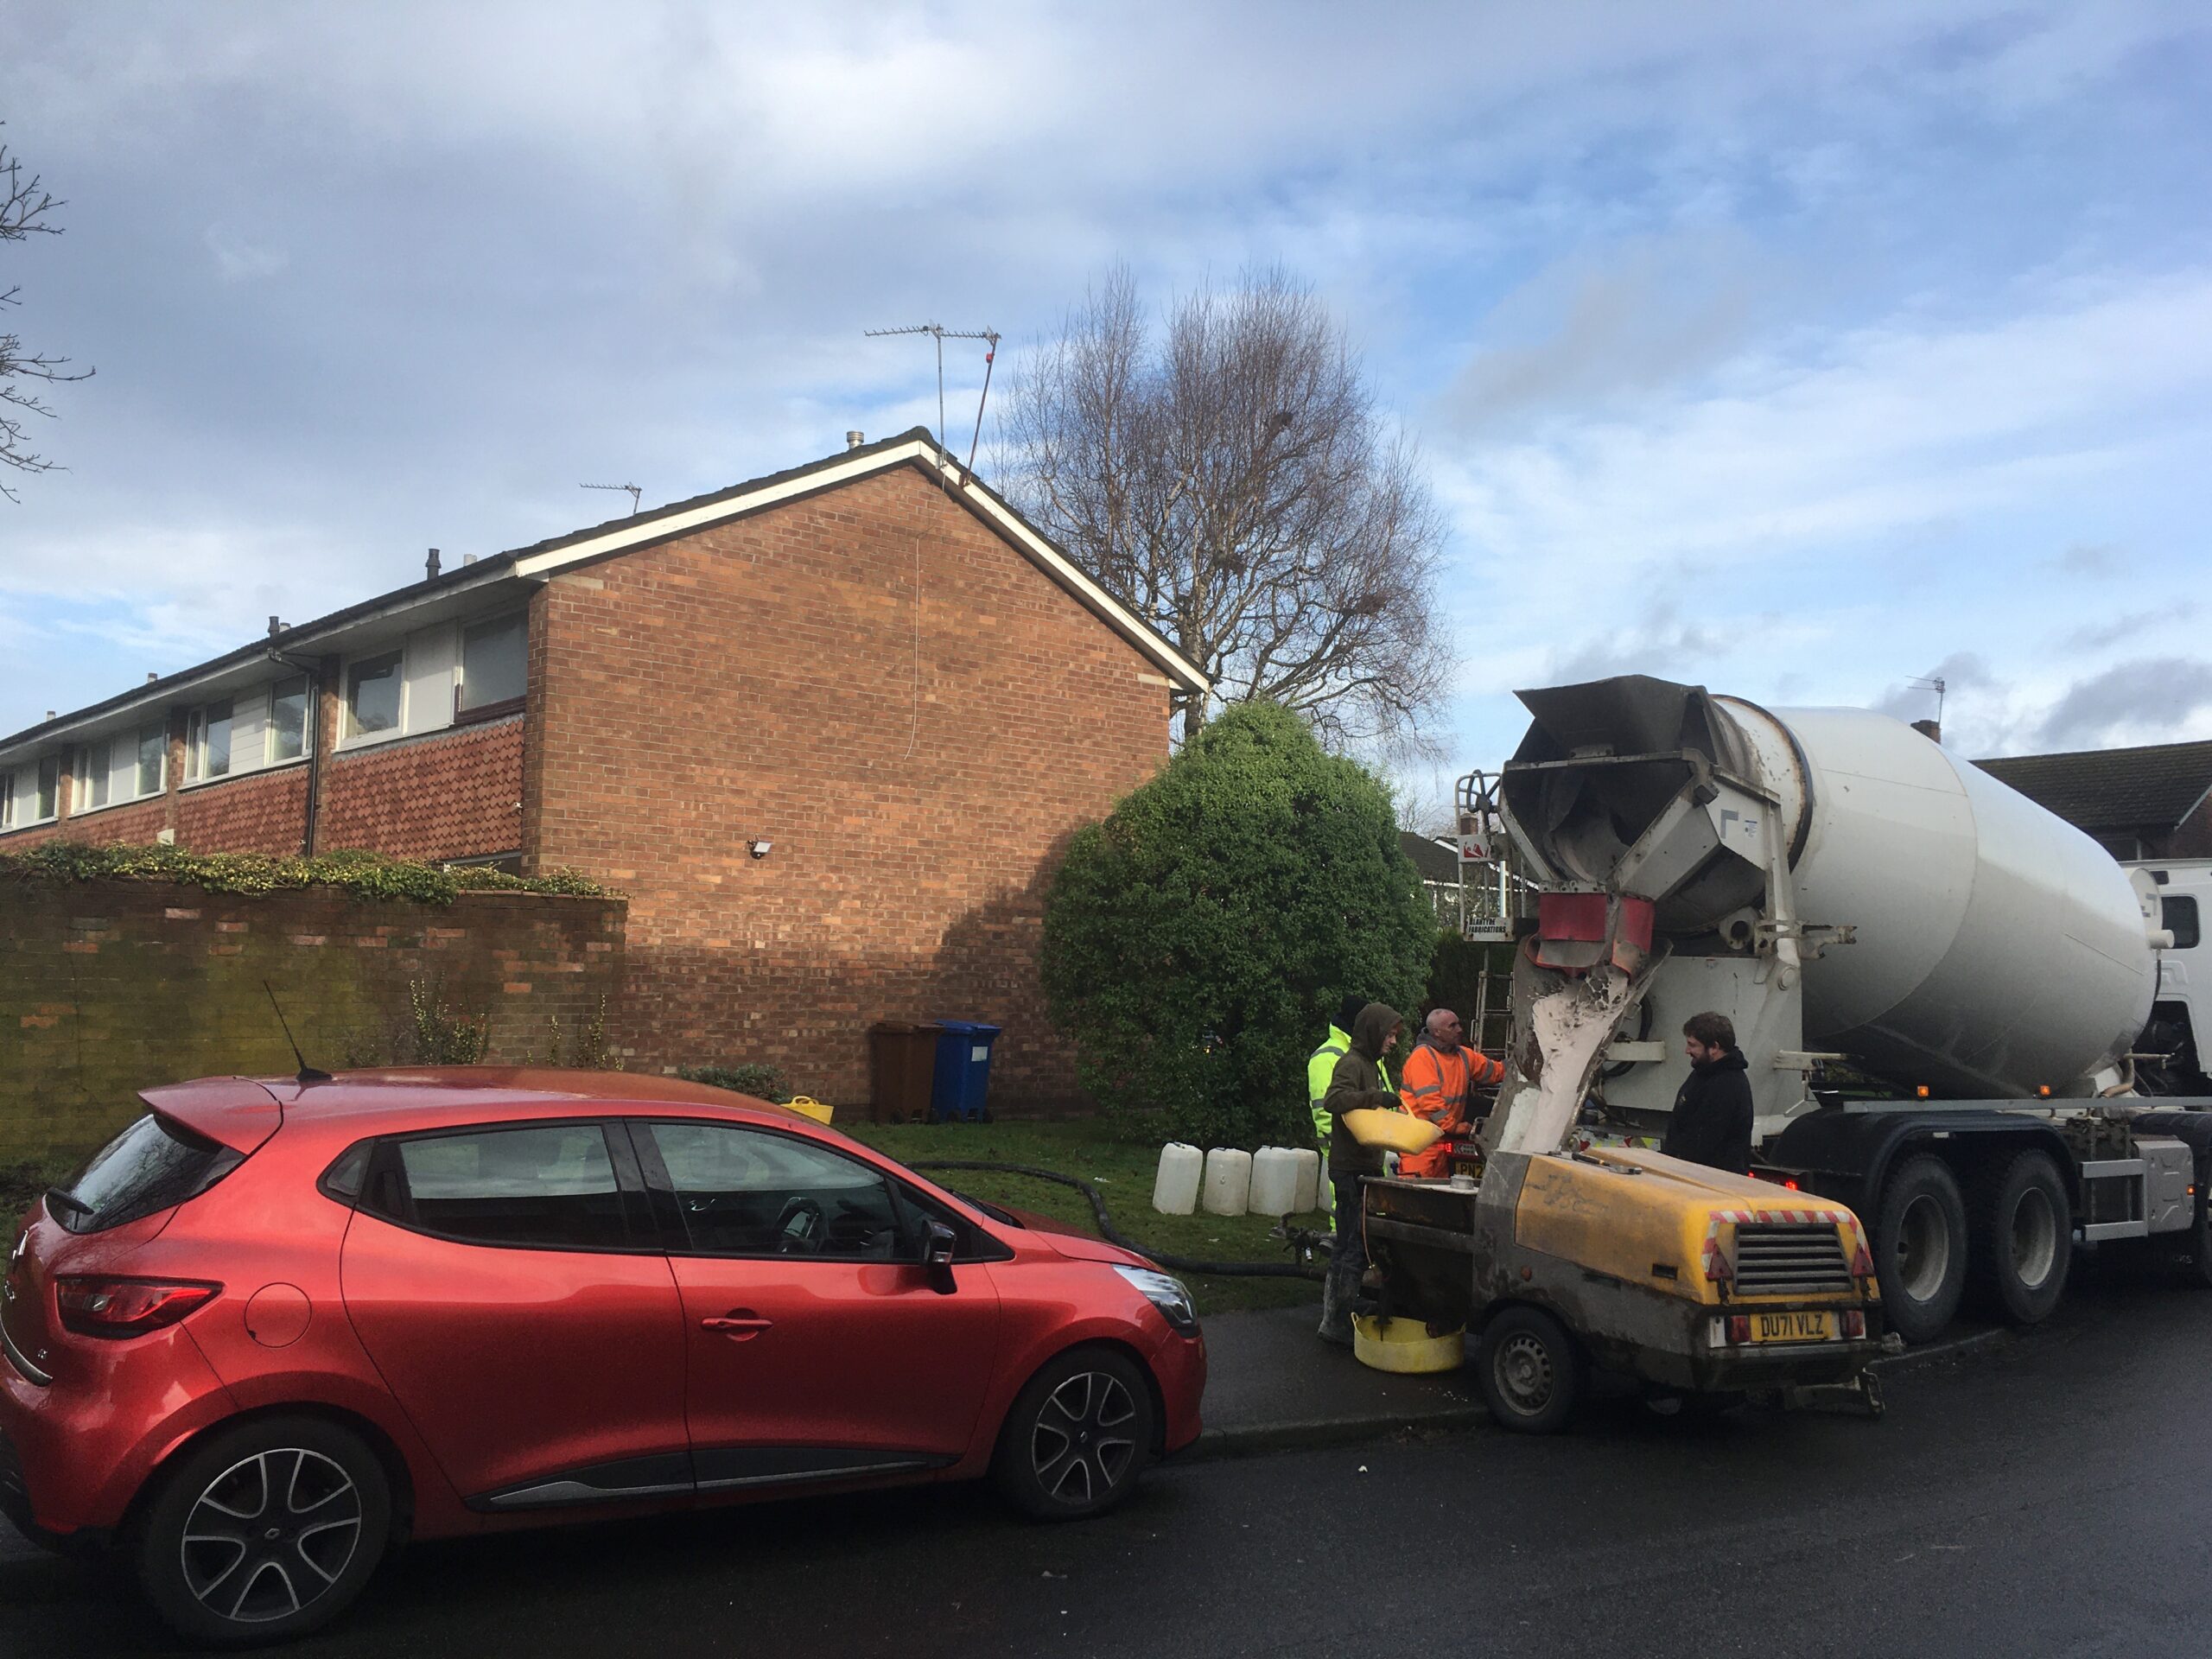
After weeks of research, enquiries, estimates, contradictory information, a few delays and a last hour product switch we mark a major milestone – a new floor poured throughout the ground floor.
It’s a Gypsol liquid screed.
No, I hadn’t heard of it either, before all this. Here’s what I learnt.
It’s an anhydrite flowing screed. It’s cement free. Instead, it recycles a by-product from acid manufacturing as the binder. It’s strong enough that it can be much thinner than a concrete floor (35mm rather than around 90mm) which matters for us because of the low ceiling height, and leaves room for a bit more insulation underneath.
This product is Gypsol HTC (High Thermal Conductivity) optimised for underfloor heating. So when we connect a heat pump to it, the system will function effectively (reasonable reaction times) and efficiently – so use less energy, and a higher proportion of renewable energy.
Cement production is really carbon intensive. But this isn’t, and because we need only a third of the amount than concrete, the emissions are a fraction of a concrete floor (80-90% less).
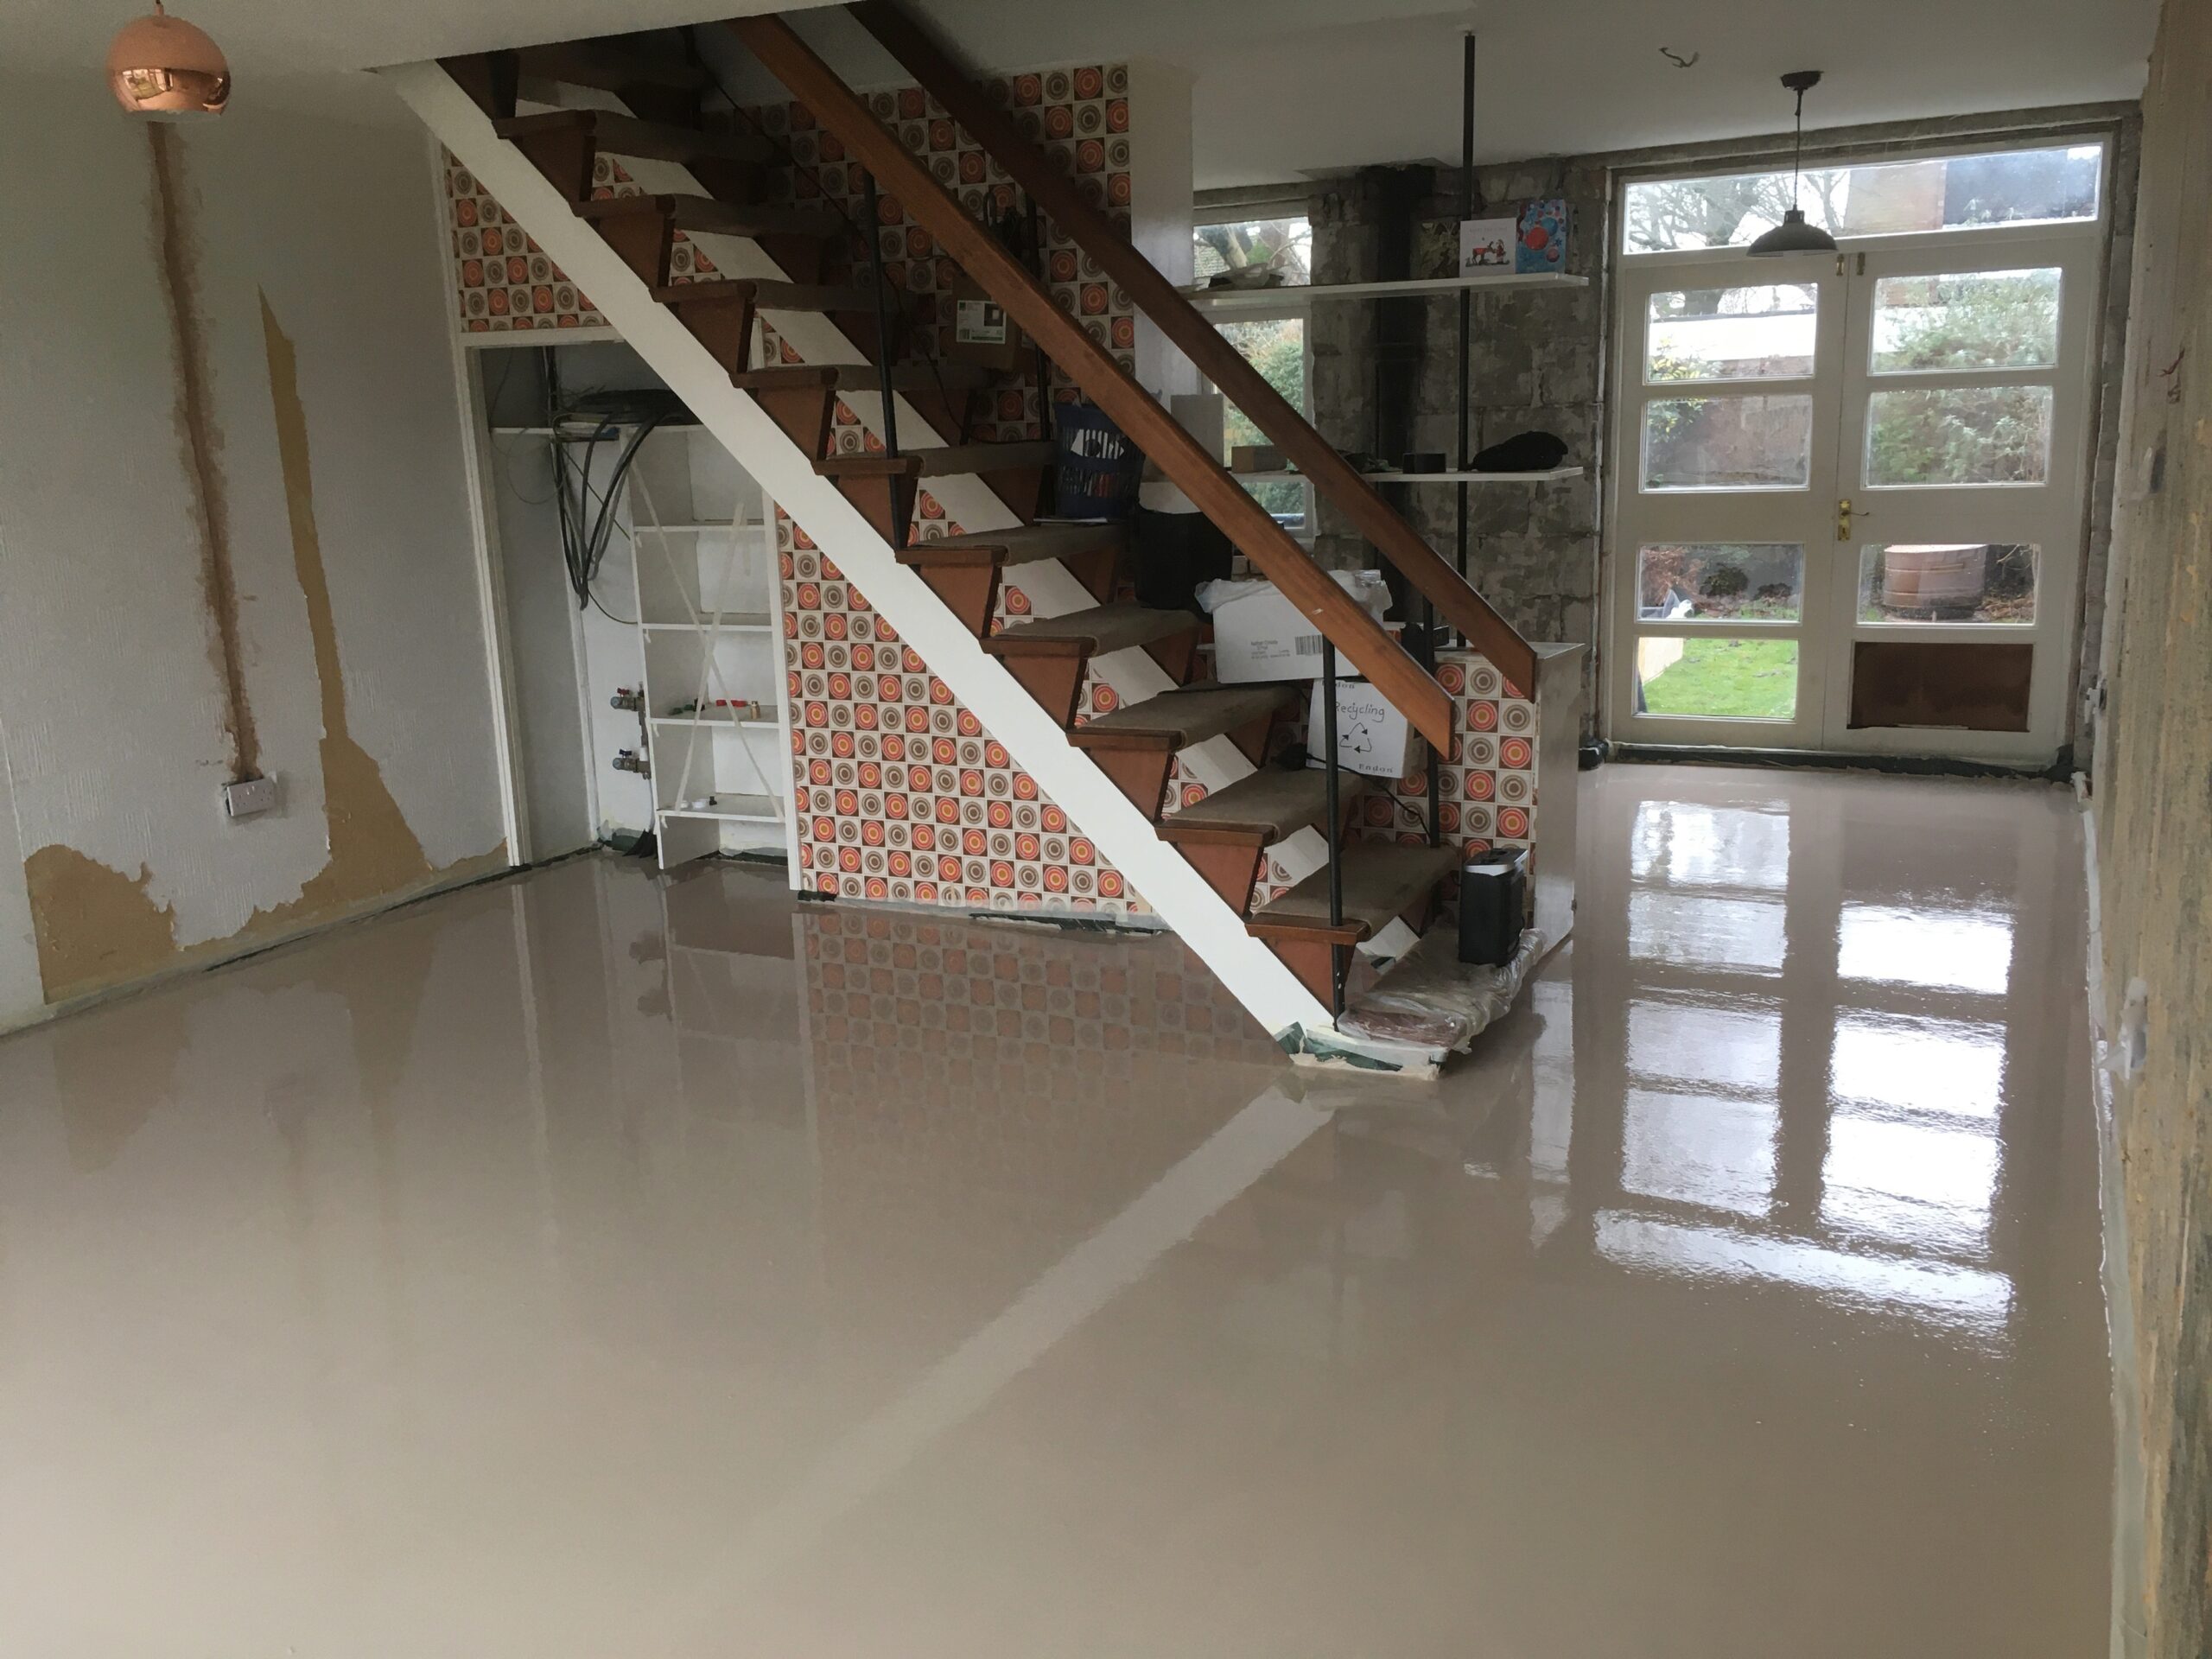
It will be our finished floor surface, after sanding, & coating with an epoxy resin (solvent free). The colour can’t be guaranteed as it can depend on the sand at the mixing plant on the day, so we’re really pleased it’s more of the hoped for light sandy shade, than a grim grey.
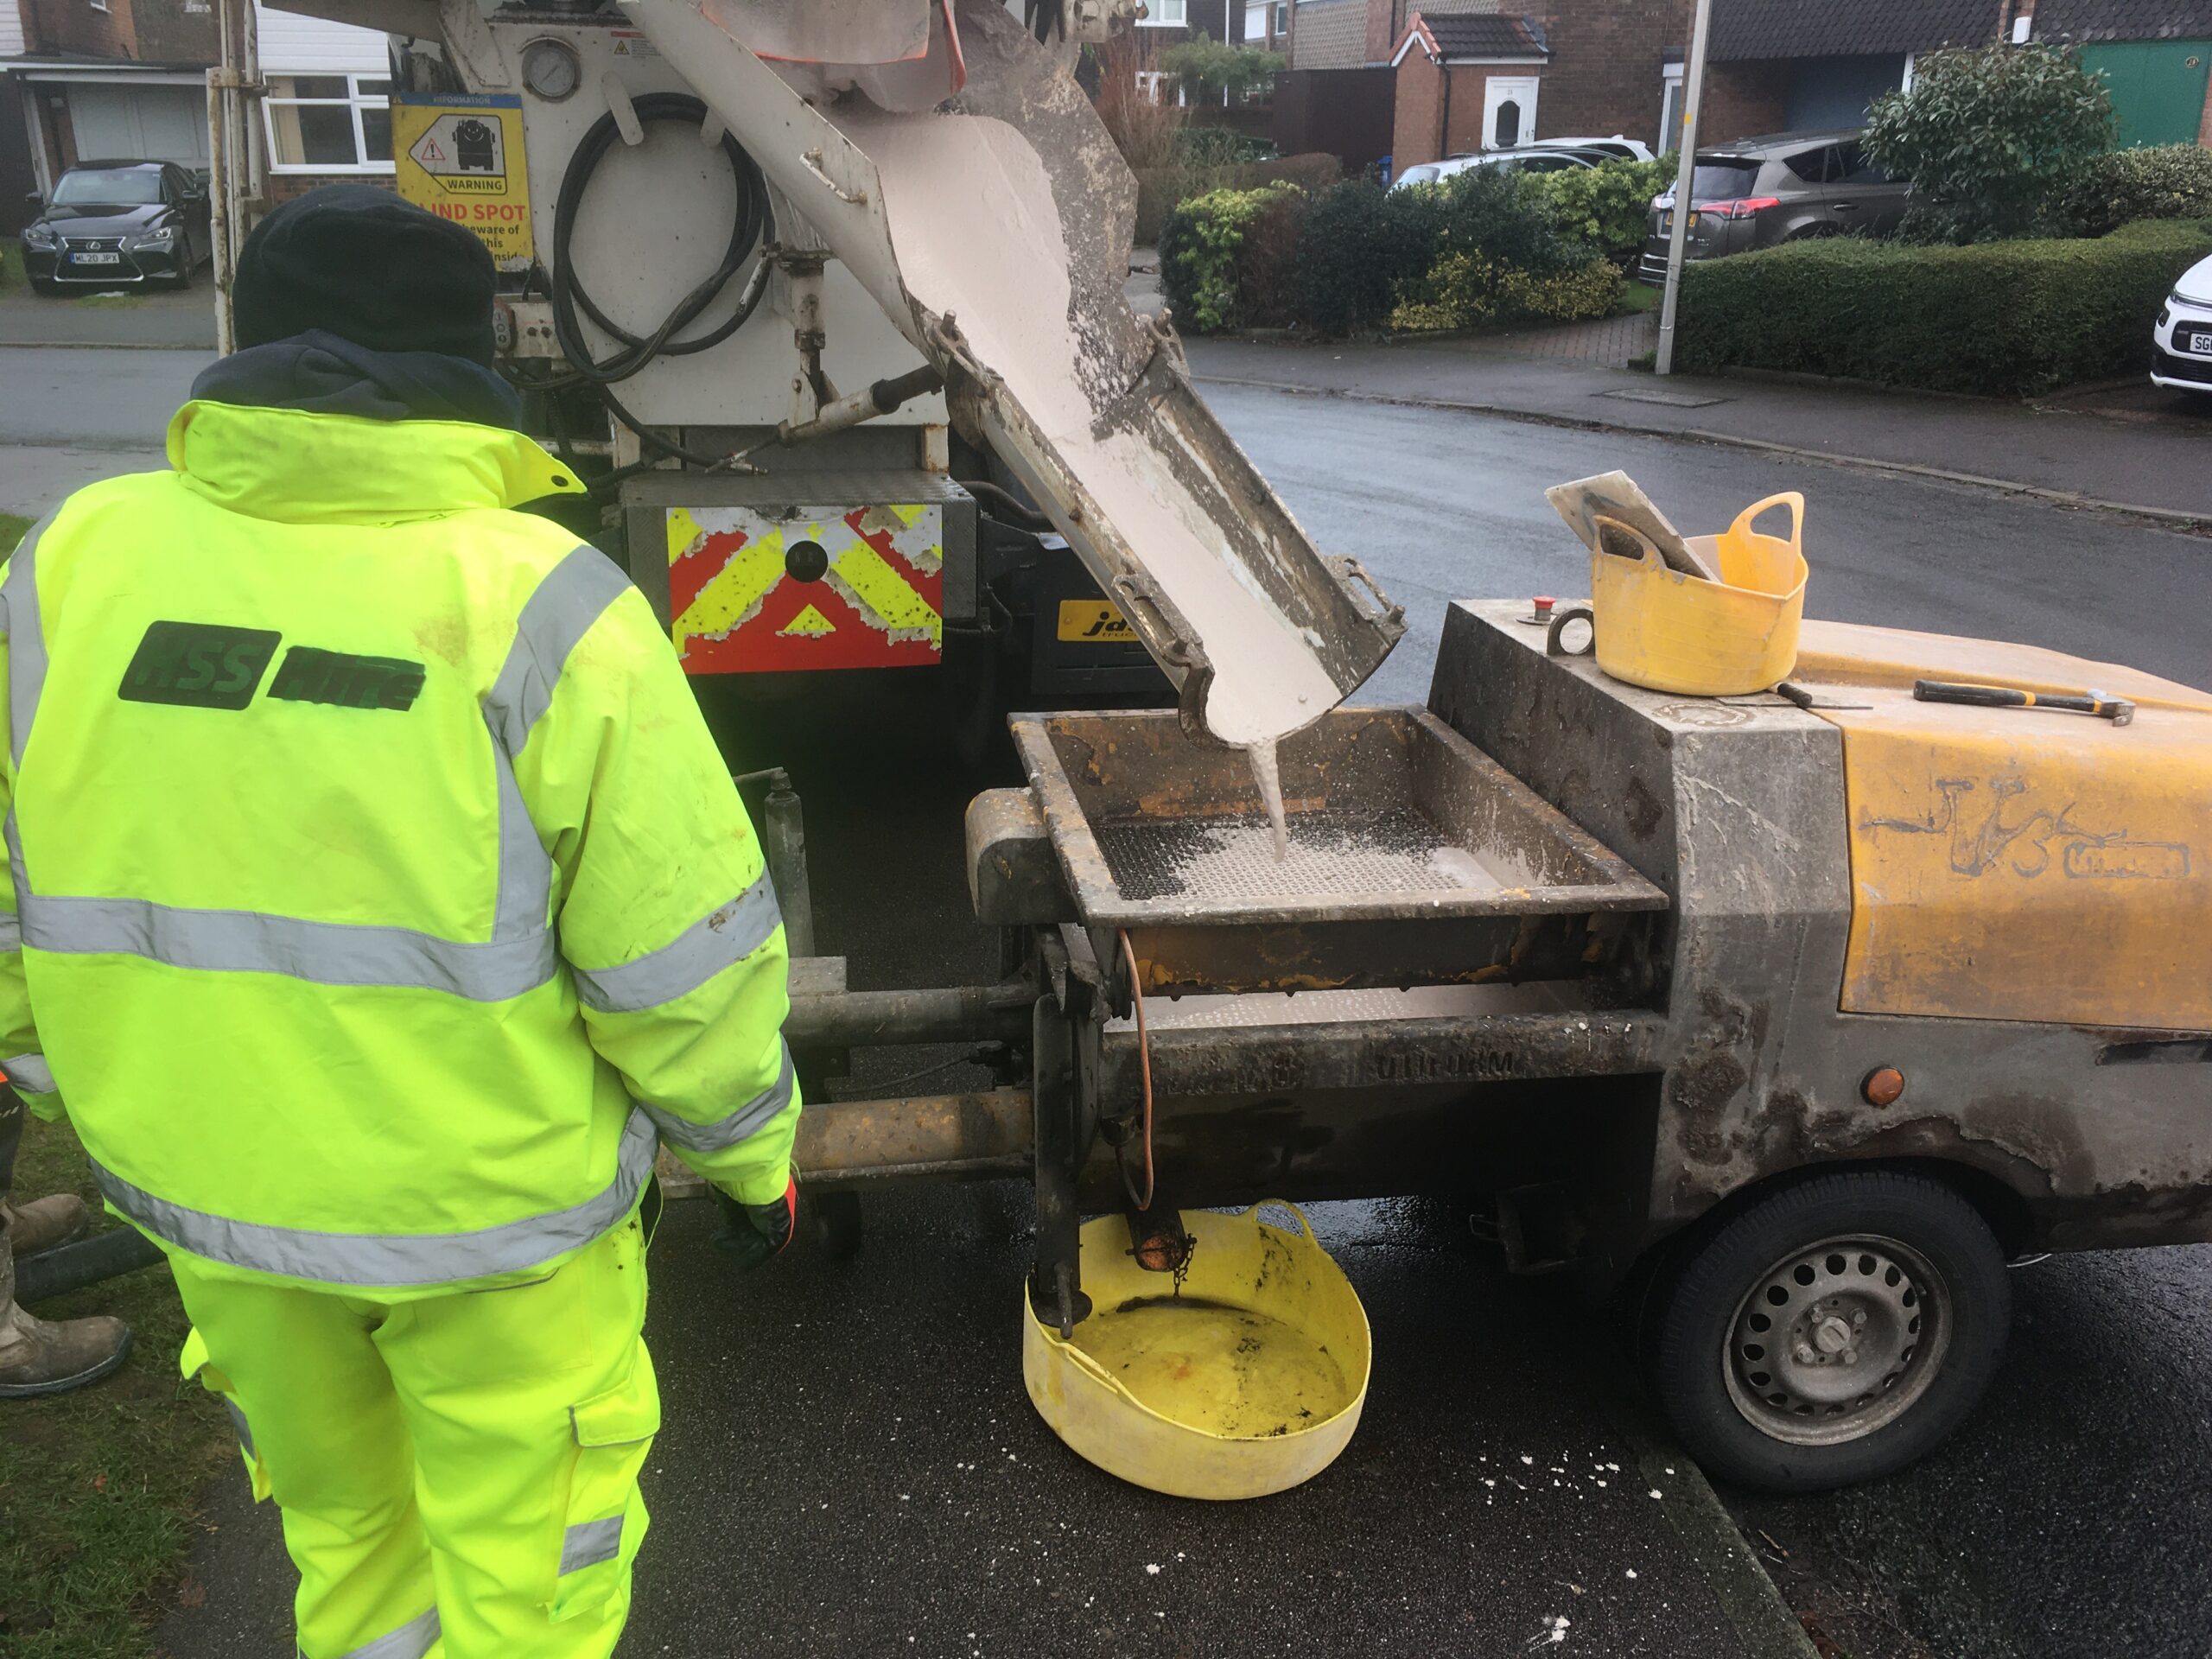
Video 1 – Pouring & Spreading
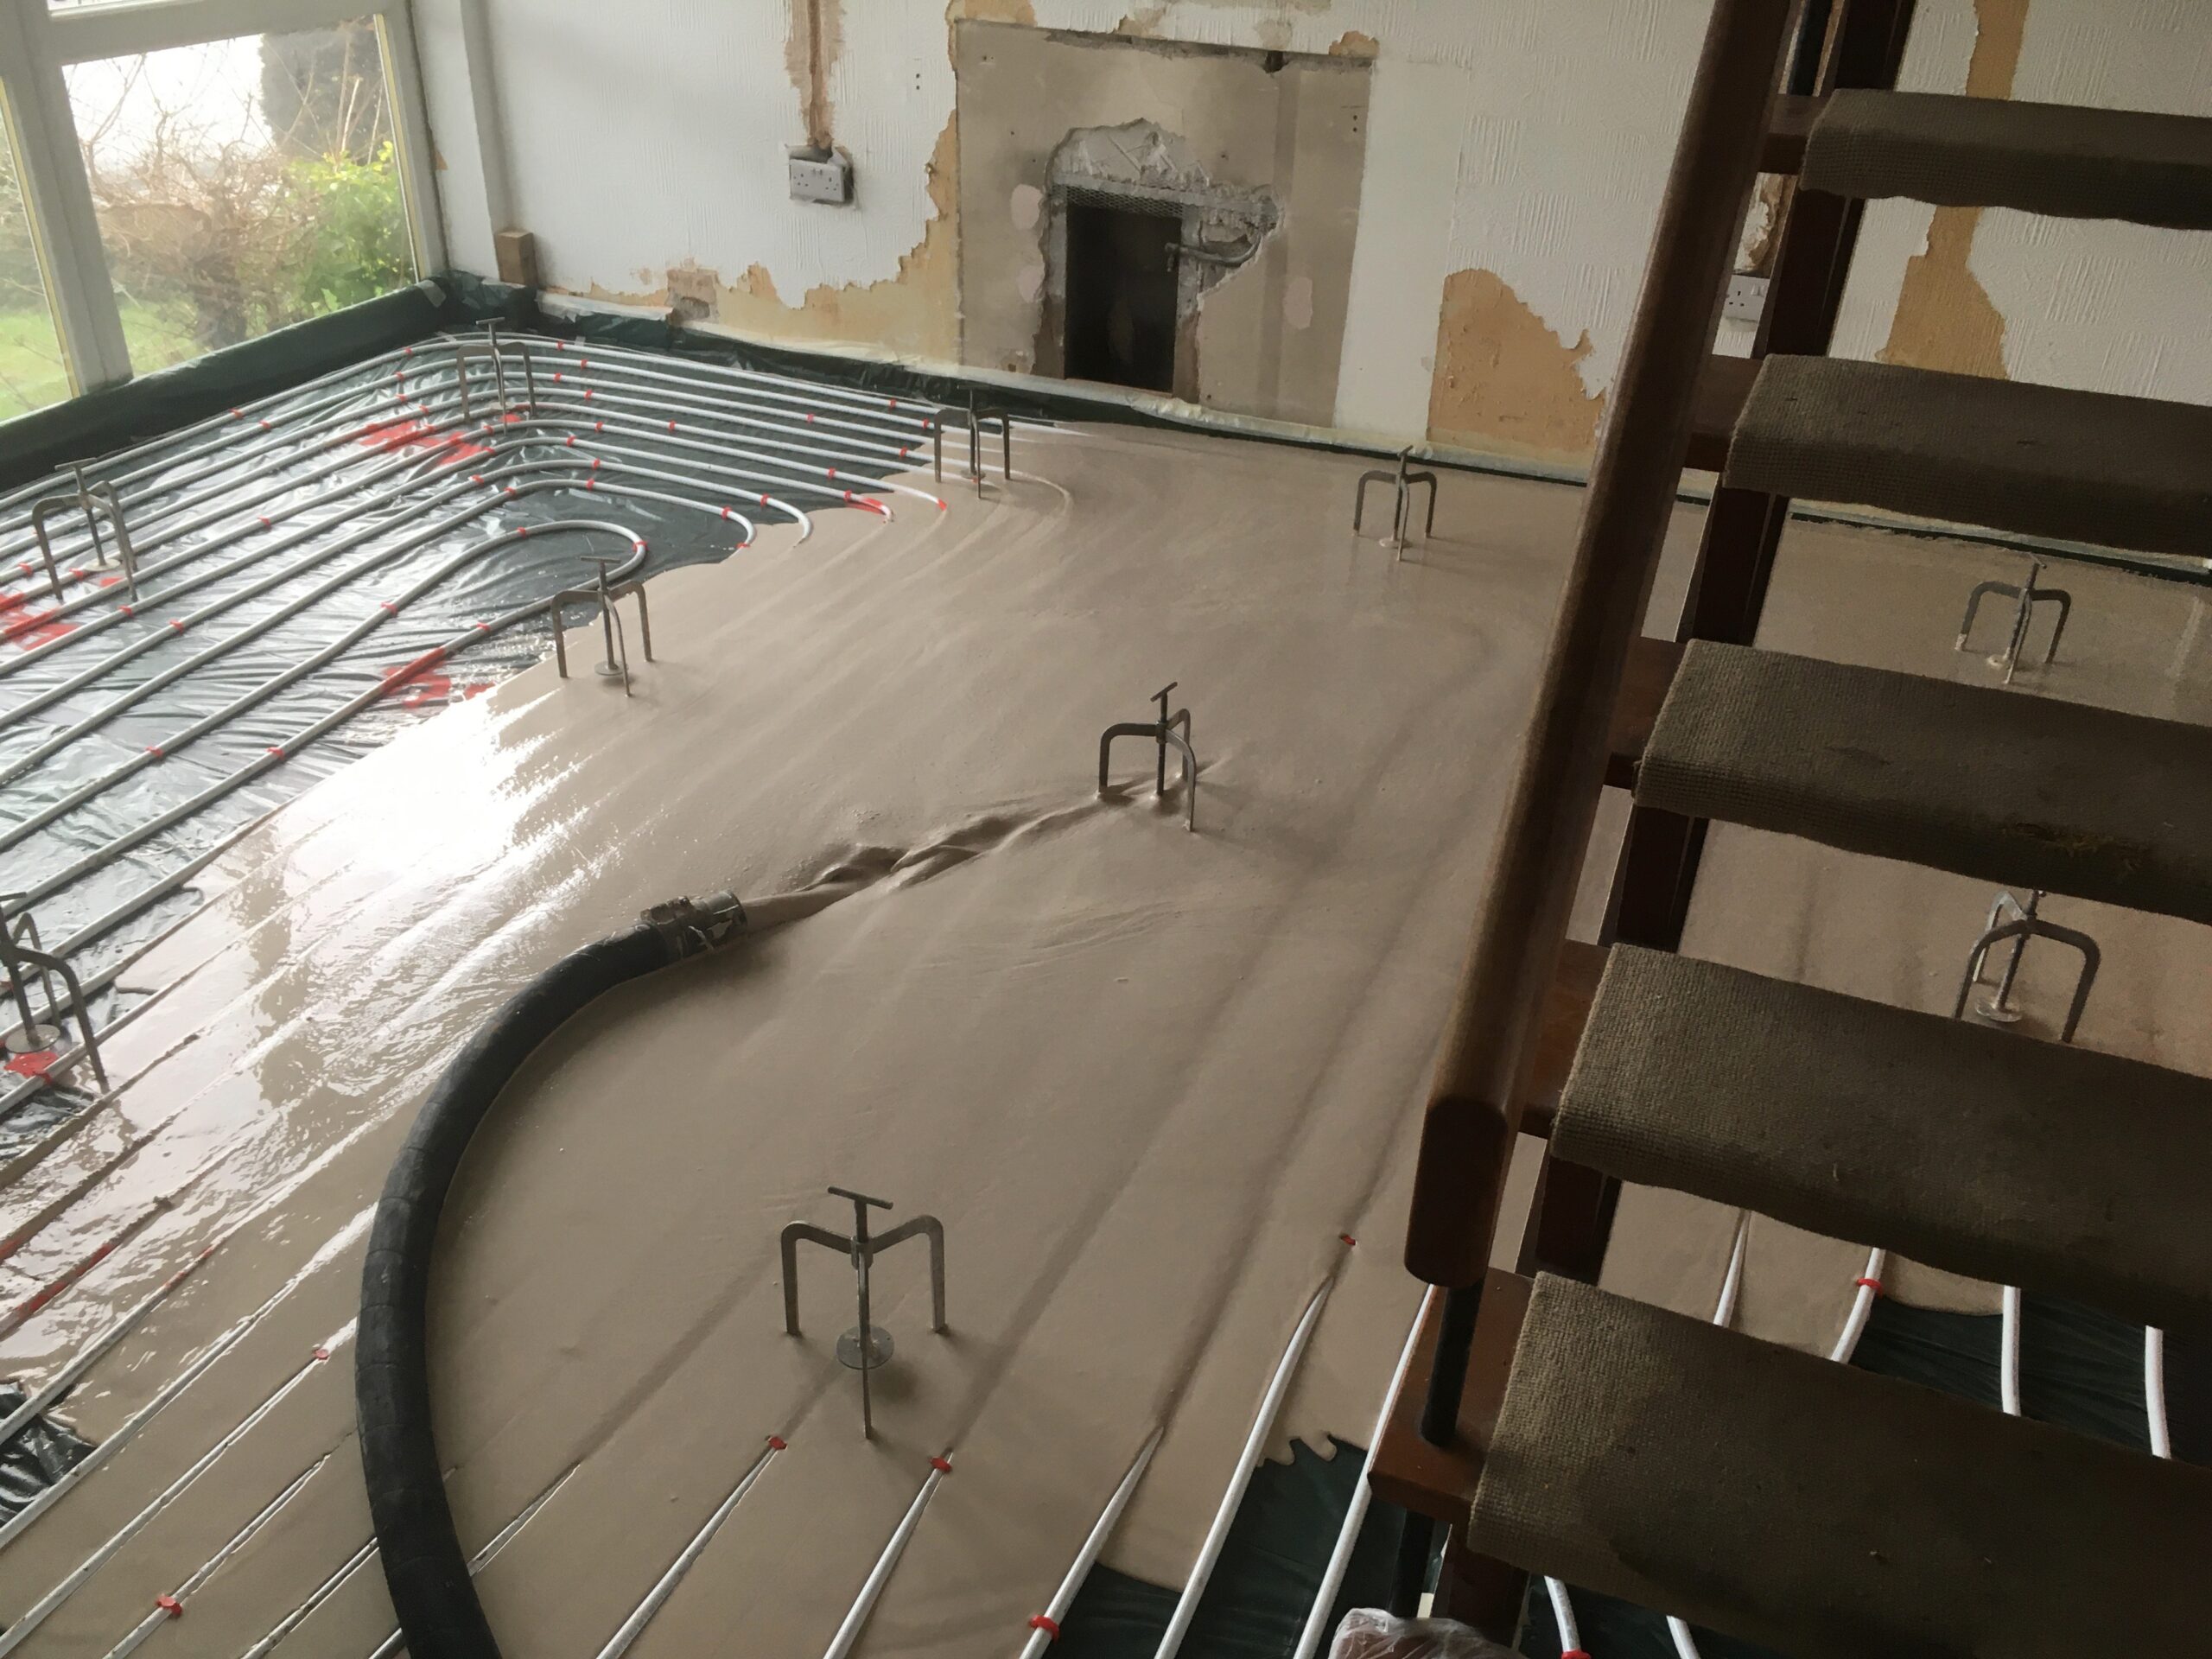
The red spot markings are the required depths to achieve a flat, level surface, determined in advance by a laser survey.
The tripods are depth markers, adjusted for each spot.
Video 2 – Pour complete
Video 3 – Dappling
Dappling to ensure a smooth finish.
We can walk on it in a couple of days, and sand it in a week. Full drying out takes about 1mm a day, so weeks. And we don’t yet have a heating system to help it along, unfortunately. So I’ll borrow an industrial dehumidifier. In a month I can coat it, for a finished floor surface protection. In the mean time… wall insulation.